# Using Database
OI applications can make use of a database to store information. OI applications use Write, Read, Table, Image Capture, and Image Viewer components to interact with the database. The database can also be utilized by custom scripts for more complicated applications.
Prior to 2017 OI utilized Postgresql as the built in database. While this provided considerable potential for complex applications, real world use showed that the speed and simplicity of SQLite resulted in a better user experience. Thus, as of 2017 OI uses SQLite as the database back end.
The most common applications are storing recipes and logging events, such as RFID scans. Sample Program - RFID Log
# Sample OIB program
The sample program logs RFID scans to the database using Database Write and Database Table components.
# Enable RFID Scanning
Enable RFID hardware in: OI config screen → User Management → RFID Configure. Add users.
Note
When enabling user management, make sure to create a user with a text password and User Management privileges and keep a note of that user/password somewhere.
# Create Tags
In OIB, create Tags for user information: userid, username, and group. In this sample, we are using OI's internal storage.

Note
username is a 30 character CharA
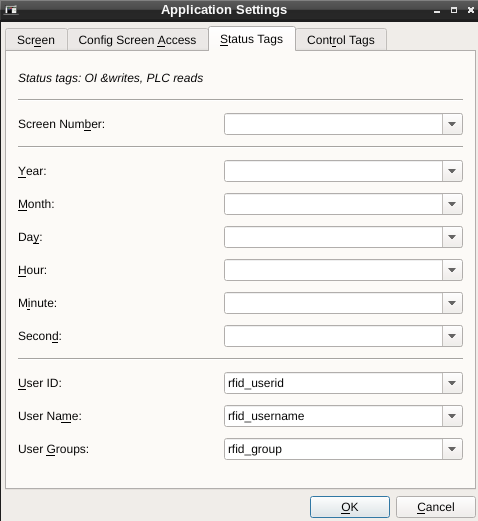
# Set Status Tags
Under Application → Settings → Status Tags, set the userid, username, and group tags to the ones we just created.
# Add DBWrite Component
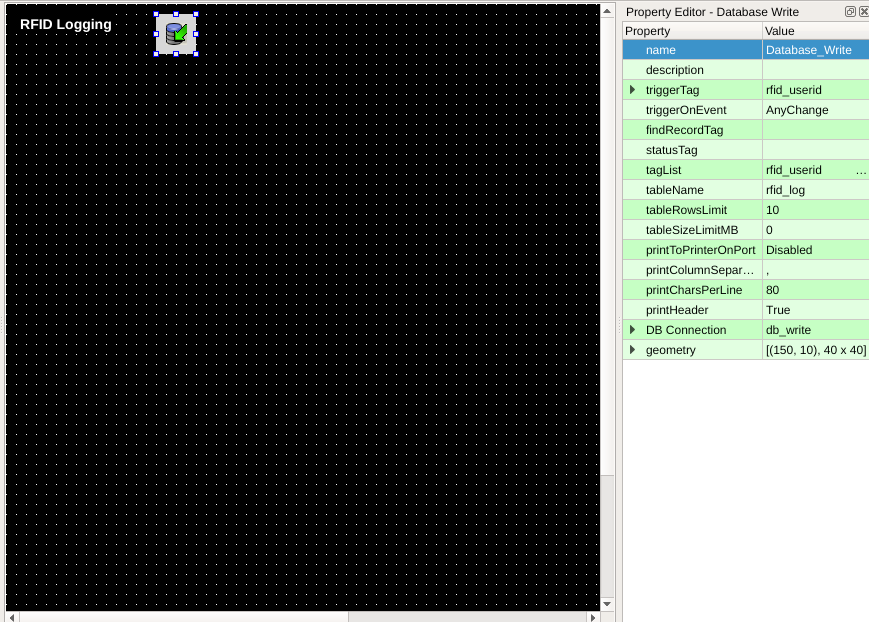
Place a Database Write component on your screen. We will need to set:
- triggerTag: triggers the Database to write an entry. Here we will use rfid_userid to trigger whenever a user is logged in.
- triggerOnEvent: set this to anyChange to log all accesses. (ZeroToNonZero will not log when a different user logs in while another user is already active)
- tagList: this is a semi-colon list of tags to write, here we will use: rfid_userid; rfid_username; rfid_group
- tableName: This will name the database table in which we are storing the data. We will use rfid_log.
- tableRowsLimit: We will set this to 10 to only keep the 10 most recent events. To keep all events set this (and tableSizeLimitMB) to zero.
- DB Connection: We actually won't make changes here, but there are some settings that are good to know about:
- driver: SQLite - this is the backend database, and currently only choice
- databaseName: oi - the default will work most of the time. If you need completely separate databases, you can use a different name, and the databases will be in separate files.
- userName, password: not used for the SQLite driver.
# Add DB Table Component
Place a Database Table component. We will need to set:
- dataSource: This is the SQLite query that provides the data. Here we will use: select * from rfid_log
- refreshTag: rfid_userid
- refreshOnEvent: AnyChange
- refreshTime: We set it to zero since we are refreshing every time rfid_userid changes, but you can also set to automatically refresh after however many seconds you would like.
- numOfColumns: When 0, this will display all columns. Here we are looking for 4 columns. When you set 4, you will see 4 Column attributes we can set. We will show the 3 tags we set above, as well as when the entry was recorded. This is available using a special column db_store_time (alternatively, we could use oi_store_time). Set them to:
- Column 1: colHeading Date, dbColName: db_store_time, width:150, readonly: true
- Column 2: colHeading User ID, dbColName: rfid_userid, width:50, readonly: true
- Column 3: colHeading User Name, dbColName: rfid_username, width:200, readonly: true
- Column 4: colHeading Group, dbColName: rfid_group, width:100, readonly: true
# Test
You should be able to transfer the application to your OI terminal and test.